Little Miss had her first party invite a few weeks ago and today was finally the day after much asking. The theme for said party was 'pirates' which isn't too demanding especially not since recently it was pirates day at nursery.
I dug out her pirate waistcoat, some skinny jeans and cut up an old white school shirt to make her look a bit more shabby like. Now, Little Miss wanted to be a bit different so we toddled off to the fabric store a week or two ago to have a look, you know see if anything caught our eye. Well it did. Little Miss found some netting and as she did I remembered something I 'pinned' recently on Pinterest about making no-sew tutus. Considering I'm machine phobic right now (not brave enough yet and after seeing a lovely mini pink sewing machine belonging to Viv (Melksham Mum) I am keen to buy one and finally learn!)
Anyway, I stayed up last night making this 'no sew' tutu and I was really pleased with it. While I was putting it together I thought of my lovely followers and thought I'd show you how I made it. I kind of had to wing it but I'm alright with that it's okay to find your own way!
No Sew Tutu
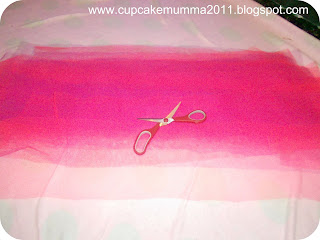
First of all you need your tools!
We chose a meter each of red and purple netting from our local fabric store both costing £1.60,
Ribbon of choice- 1m thick ribbon is best £1
Scissors
Ruler -If you really want one, as you can see I didn't really want one!

First, take the ribbon and tie a knot leaving length at the end (this is for tying a bow later)
Measure your child so you have the correct waist measurement or you can do guess work like me!
Tie a knot at the other end leaving a good few inches again for the bow later on

Take your netting, lay it out on the floor length ways and begin folding over so you end up with a length of rolled netting.

Cut the ends off your netting. These are quite thick and can be untidy from rolling up.

Fold your netting in half and cut at the folded point.
You should be left with 4 rolls of netting like so:

Cut your netting about 3 inches all along the roll
Here's my pile of little cut up netting

I found my netting still too long, whether I did something wrong I'm not sure so I just laid out the cut up netting and snipped it half way again.
Here is my netting now an appropriate length

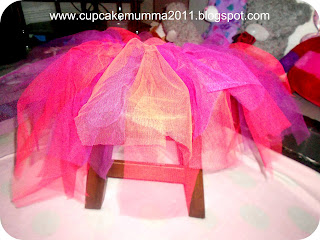
Take your ribbon, It helps if you do as I did and tie each end to stools, chairs anything that makes the ribbon taught.
Take your netting, fold it length ways so it's thinner again and tie onto your ribbon
Slide the netting to the knot you tied

Keep tying the netting onto the ribbon pushing it to the end so it all bunches up nicely

Until you have added all your netting!
You should now have your tutu..Enjoy!

I hope that wasn't too hard to follow. Have fun making your tutu for your little one (or yourself! I know i'll be making them for my Race For Life in July)It would be great if you could share your make with me as well!
Check out Cupcake Mumma again soon to see Little Miss donning her new tutu in her pirate gear.
Cupcake Mumma
I love this and made tutus for myself and Edith last year to wear to Camp Bestival using this 'method'. I think it would work well with scraps of other fabrics too.
ReplyDeleteOh, the sewing machine- £50 well spent BUT if I start doing more technical stuff will probably need an 'upgrade', but great to get starting with x
Thank-you! Oh would love to see your tutus! Thanks for info on the sewing machine as you can see I am rather partial to pink lol. I can't imagine needing a bigger one but i have my Mums when I 'graduate!' x
DeleteI love this idea! Scraps made from old T shirts would work really well because they wouldn't fray !
ReplyDeleteThanks for your comment :) I think you're right would need a lot more to make the volume nice and big!
Delete